[Camping]17. 텐트, 혼자서도 척척! 초보 아빠의 텐트 피칭 완벽 가이드 (Feat. 좌충우돌 IT 기획팀장)(Pitch a Tent Solo! A Beginner Dad's Perfect Guide (Feat. The IT Planner's Trial and Error))
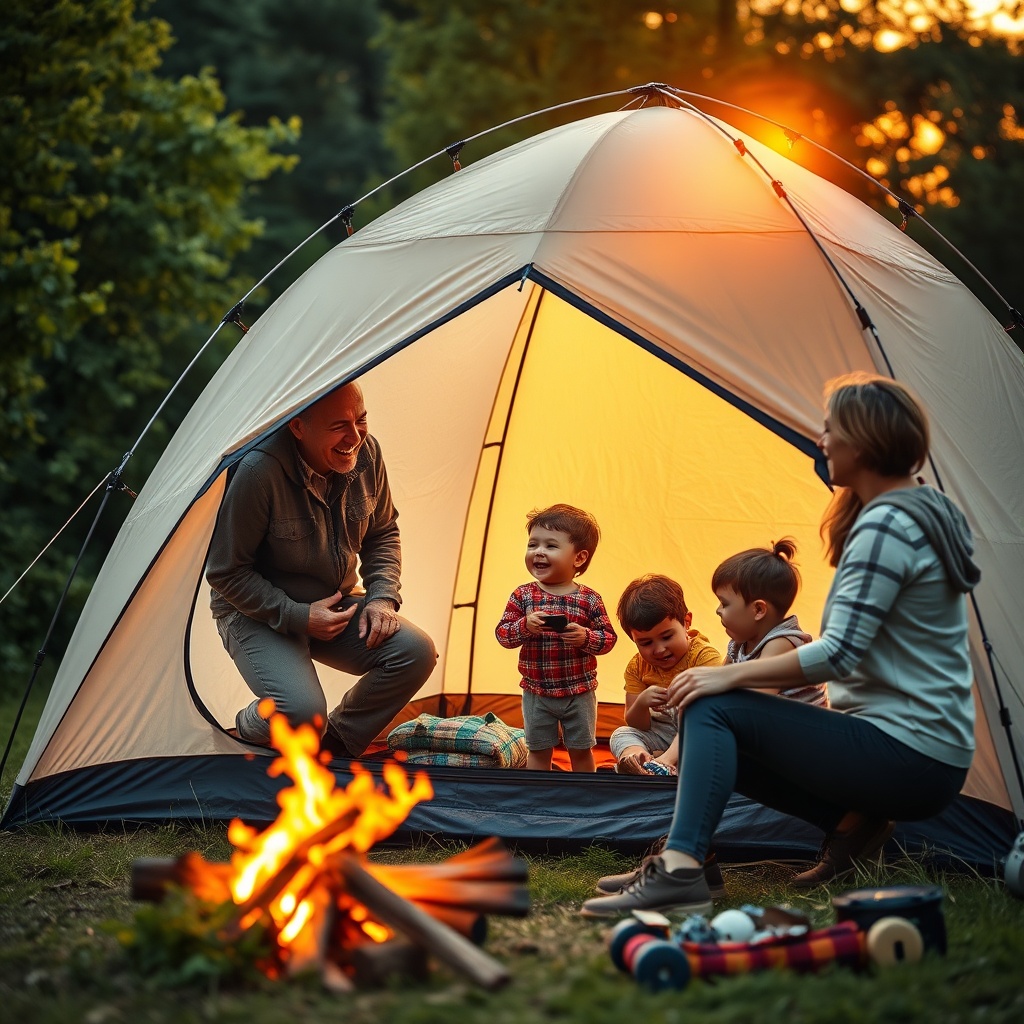
주말에 뭐 할까 막막하시죠? 저도 얼마 전까진 그랬어요. 50대 IT 기획팀장인 제가 왠 캠핑이냐구요? 처음엔 복잡한 장비와 텐트 피칭 걱정에 엄두도 못 냈지만, 아이들과 아내가 자연 속에서 환하게 웃는 모습을 보고는 덜컥 용기를 냈지 뭐예요. 캠핑을 시작하고 보니, 텐트 피칭은 마치 복잡한 프로젝트 기획 같아서 처음엔 막막했지만, 몇 번의 좌충우돌 끝에 나름의 노하우가 생기더라고요. 오늘은 저 같은 초보 아빠 캠퍼들을 위해, '텐트, 혼자서도 칠 수 있어요!'를 주제로 제가 겪었던 웃픈 실패담과 뿌듯한 성공 꿀팁을 아낌없이 풀어볼까 합니다. 이 글만 읽으면 다음 캠핑에선 텐트 앞에서 헤맬 일 없을 거예요! 😊 여러분도 저처럼 '캠린이'에서 '캠핑 달인'으로 가는 첫걸음을 함께해요!
왜 텐트 피칭이 두려웠을까요? 😱 (IT 기획팀장의 좌충우돌)
제가 IT 기획 팀장이다 보니, 뭘 시작해도 계획부터 완벽하게 세우는 습관이 있어요. 캠핑도 마찬가지였죠. 유튜브와 블로그를 섭렵하며 머릿속으로는 이미 '텐트 피칭 시뮬레이션'을 수십 번 돌렸지 뭐예요. 하지만 실전은 다르더라고요! 첫 캠핑 가서 가장 당황스러웠던 건 바로 텐트 피칭이었어요. '이게 대체 무슨 일이야? 설명서는 왜 이렇게 어렵지?' 하는 생각에 식은땀이 줄줄 흘렀죠. 계획은 완벽했는데, 막상 넓은 벌판에서 바람이랑 씨름하며 텐트를 펼치려니 땀은 뻘뻘 나고 애들은 '아빠, 언제 돼?' 재촉하고... 결국은 옆 텐트 캠퍼에게 SOS를 쳤지 뭐예요. 지금 생각하면 웃음만 나오지만, 그때는 정말 '캠핑은 나랑 안 맞나?' 싶었답니다. 이론과 실전의 괴리를 뼈저리게 느낀 순간이었죠. 🤣
텐트 피칭, 이걸 알면 쉬워요! (핵심 원리 이해) 💡
그런데 말이죠, 텐트 피칭도 결국은 '프로세스'이자 '시스템'이더라고요. IT 기획할 때처럼 핵심 원리를 이해하고 단계를 밟아가면 어렵지 않아요. 대부분의 자립형 텐트는 폴대(기둥)를 끼워 텐트의 뼈대(프레임)를 만들고, 그 위에 플라이(방수포)를 씌운 다음, 팩(고정 말뚝)으로 땅에 단단히 고정하는 방식이에요. 이걸 머릿속에 시각적으로 그리면 훨씬 수월하답니다. '아, 우리 텐트가 이렇게 세워지는 거구나!' 하고 감을 잡는 거죠.
초보 아빠의 필수 준비물 체크리스트 📝
텐트 피칭을 시작하기 전에 이 친구들이 잘 모여있는지 꼭 확인해야 해요. 꼭 필요한 것들만 추려봤습니다!
- 텐트 본체: 너무 당연하지만, 초보에게는 자립형 돔 텐트가 가장 적합해요. (피칭이 쉽고 공간 활용도 좋답니다!)
- 텐트 폴대: 텐트의 뼈대를 이루는 핵심 부품! 미리 연결 상태를 확인하고, 휘어진 곳은 없는지 체크하세요.
- 팩 & 망치: 텐트를 땅에 고정하는 못과 망치. 초보자는 손 다칠 위험이 적은 고무 망치를 추천해요. 팩은 여분까지 넉넉하게 챙기면 좋습니다.
- 스트링 (가이라인): 텐트가 바람에 날아가지 않도록 잡아주는 끈. 강풍에 대비해 텐트 모서리뿐 아니라 중간중간에도 연결할 수 있도록 준비해두세요.
- 그라운드시트 (방수포): 텐트 바닥을 보호하고, 땅에서 올라오는 습기를 막아줍니다. 텐트보다 살짝 작은 사이즈가 좋아요.
- 장갑: 손 보호는 기본! 잔가지나 벌레로부터도 보호해줘요. 특히 팩 박을 때 손이 까지는 걸 방지해줍니다.
- 설명서 & 스마트폰 (유튜브): 가장 중요한 히든카드! 잃어버리지 마시고, 필요하다면 바로 유튜브를 켜세요!
텐트 피칭, 이제 혼자서도 척척! (단계별 완벽 가이드) 🏕️
자, 이제 실제 피칭 순서입니다. 제가 수많은 시행착오 끝에 터득한 노하우를 담았으니, 이대로만 따라 하면 성공할 거예요!
- STEP 1: 명당 선정 & 바닥 정리 🧹
텐트 칠 곳을 고를 때, 가장 먼저 평평하고 배수가 잘 되는 곳을 찾아야 해요. 비 오는 날엔 물이 고이지 않는지, 밤엔 경사 때문에 잠자리가 불편하진 않을지 미리 상상해 보세요. 돌멩이나 뾰족한 것이 있다면 과감하게 치워주시고요. 작은 돌멩이 하나 때문에 다음 날 아침 허리가 아플 수 있답니다! 🤣💡 알아두세요!
텐트 아래 그라운드시트를 깔면 텐트 바닥 보호는 물론 땅에서 올라오는 습기 차단에도 큰 도움이 됩니다. 텐트 크기에 딱 맞거나 살짝 작은 사이즈가 깔끔하고 좋아요! - STEP 2: 텐트 본체 펼치기 & 폴대 조립 🛠️
텐트 본체(이너 텐트)를 자리에 펼치고, 이제 텐트의 뼈대인 폴대를 조립할 차례예요. 폴대는 보통 고무줄로 연결되어 있어서 착착 끼우기만 하면 됩니다. 조립된 폴대를 텐트 스킨에 있는 슬리브(폴대 통과 구멍)에 맞춰 조심스럽게 밀어 넣어요. 이때 급하게 하다 보면 폴대가 휘거나 부러질 수 있으니, '천천히, 조심스럽게'가 핵심입니다. 마치 복잡한 케이블을 정리하듯이 말이죠!⚠️ 주의하세요!
폴대 이음새 부분이 완전히 결합되었는지 꼭 확인하세요. 덜 결합되면 텐트 형태가 제대로 잡히지 않거나, 바람에 취약해져 쉽게 무너질 수 있어요. - STEP 3: 텐트 자립시키기 ✨
폴대가 텐트 스킨에 다 끼워지면, 폴대 끝을 텐트 모서리에 있는 아일렛(금속 고리)에 끼웁니다. 혹은 클립 형태로 되어 있는 곳에 고정시키면 돼요. 그럼 텐트가 서서히 자기 모습을 드러내며 자립하기 시작할 거예요. 이 순간이 바로 '아, 내가 해냈구나! 나도 이제 캠핑 아빠다!' 싶은 뿌듯함이 밀려오는 순간이죠! 😊 처음엔 혼자서 씨름했지만, 이젠 아이들도 '아빠 최고!'라며 텐트 안으로 뛰어들어갈 때 가장 행복하답니다. - STEP 4: 팩 다운 & 스트링 고정 💨
이제 팩을 박아 텐트를 땅에 단단히 고정해야 해요. 이때 망치로 팩 머리 부분을 비스듬히(약 45도 각도) 내리쳐야 잘 박히고 고정력도 좋습니다. 바람의 방향을 고려해 팩을 박고, 스트링(가이라인)을 당겨 텐트의 균형을 잡아주세요. 저희 가족은 한 번 바람에 텐트가 날아갈 뻔한 아찔한 경험이 있답니다. (하마터면 캠핑장이 아닌 저 멀리 벌판에서 잠들 뻔했어요.😂) 이때 제가 IT 기획 팀장으로서 '최악의 시나리오 대비 및 리스크 관리'의 중요성을 뼈저리게 깨달았죠. 강풍 예보가 있다면 더욱 꼼꼼하게 팩 박는 것이 중요해요! - STEP 5: 플라이(방수포) 씌우기 & 마무리 ✨
마지막으로 텐트 위에 플라이(레인 플라이)를 씌우고 스트링으로 고정하면 끝! 플라이는 비바람과 햇볕으로부터 텐트를 보호하는 중요한 역할을 합니다. 지붕 덮듯이 쉬운데, 앞뒤 방향이 헷갈릴 수 있으니 잘 확인해야 해요. 보통 출입문이 있는 쪽이 앞이겠죠? 플라이까지 씌우고 나면 비로소 안락한 우리만의 아지트가 완성된답니다. 이제 남은 건 맛있는 캠핑 요리와 별 보는 시간 뿐!
IT 아빠의 캠핑 꿀팁 대방출! ✨ (피칭 외 팁)
- Tip 1: 처음엔 무조건 '자립형 돔 텐트'를!
초보 캠퍼에게는 자립형 돔 텐트가 가장 쉬워요. 폴대만 잘 끼우면 혼자서도 텐트 형태를 잡을 수 있어 시행착오를 줄일 수 있습니다. '일단 쉬운 것부터 시작하자'는 저의 IT 프로젝트 관리 원칙과도 일맥상통하죠! - Tip 2: 유튜브는 최고의 설명서!
설명서가 아무리 자세해도 실제 움직임을 따라가긴 어렵죠. 본인 텐트 모델명을 유튜브에서 검색해 보세요. 실제 피칭 영상을 보면서 따라 하면 훨씬 쉬워요. 저도 덕을 많이 봤답니다. '백문이 불여일견'은 캠핑에서도 진리예요! - Tip 3: 집에서 '예행연습' 필수!
캠핑장 가서 땀 뻘뻘 흘리며 당황하는 것보다, 거실이나 마당에서 한 번이라도 미리 쳐보는 걸 추천해요. 현장에서 버벅대는 걸 줄여주고, '아, 이렇게 하는 거구나!' 하는 자신감도 얻을 수 있습니다. 마치 중요한 발표 전에 리허설 하는 것과 같아요! - Tip 4: 장비는 한 번에 살 생각 마세요!
처음부터 완벽한 장비를 갖추려 하지 마세요. 필요한 것부터 하나씩 늘려가는 재미도 쏠쏠합니다. 마치 프로젝트의 MVP(Minimum Viable Product)를 만들고 점진적으로 발전시키는 것과 같죠! 빌려 쓰거나 저렴한 것부터 시작해 보세요. - Tip 5: 실패는 성공의 어머니, 웃어넘기세요!
처음엔 누구나 어설프기 마련입니다. 텐트가 삐뚤어지거나 폴대 하나를 깜빡하고 안 가져와도 괜찮아요. 그런 사소한 실수들이 바로 캠핑의 추억이 됩니다. 웃으며 넘기면 그게 바로 '우리만의 캠핑 스토리'가 되는 거예요. 저희 아이들이 아직도 제가 팩을 엉뚱한 곳에 박아서 텐트가 춤을 췄던 이야기를 하곤 해요. 🤣
글의 핵심 요약 📝 (IT 아빠가 전하는 마지막 당부)
- 텐트 피칭, 두려워 마세요!
처음엔 어렵지만, 핵심 원리(폴대+스킨+플라이+팩)만 이해하고 차근차근 단계별로 따라하면 누구나 할 수 있어요. - 준비와 연습이 중요!
필요한 준비물을 챙기고, 캠핑장 가기 전 집에서 미리 연습해보면 현장에서의 당황스러움을 크게 줄일 수 있습니다. 유튜브는 최고의 조력자! - 실패는 추억!
완벽하지 않아도 괜찮아요. 예상치 못한 상황과 좌충우돌 경험들이 캠핑을 더욱 풍성하게 만들고, 가족과의 소중한 추억으로 남을 거예요. IT 기획에서도 '실패로부터 배우기'는 중요하죠!
자주 묻는 질문 ❓
오늘 저의 좌충우돌 텐트 피칭 가이드, 어떠셨나요? 텐트 치는 게 조금은 만만해 보이시나요? 😊 캠핑은 거창한 장비나 완벽한 기술이 없어도 괜찮아요. 자연 속에서 사랑하는 사람들과 함께하는 그 순간 자체가 소중한 추억이니까요. 혹시 텐트 피칭이나 다른 캠핑에 대해 궁금한 점이 있다면 언제든 댓글로 남겨주세요! 저의 경험이 여러분의 첫 캠핑 여정에 작은 도움이 되기를 바라며, 다음 캠핑 노트에서 또 만나요! 🏕️🔥
Stuck wondering what to do on weekends? I was too, not long ago. Why would a 50-something IT planning team leader like me get into camping, you ask? At first, I was daunted by complex gear and the thought of tent pitching. But seeing my kids and wife laugh brightly in nature, I bravely took the plunge. Pitching a tent, for me, felt like planning a complex IT project – overwhelming at first, but after a few trial-and-error moments, I developed my own know-how. Today, for beginner camper dads like myself, I'm going to generously share my funny failure stories and proud success tips on the topic of 'You Can Pitch a Tent Solo!' Read this, and you won't have to fumble with your tent at the next campsite! 😊 Join me on this first step from 'Camp-noob' to 'Camping Master'!
Why Was Tent Pitching So Daunting? 😱 (An IT Planner's Trial and Error)
As an IT planning team leader, I have a habit of making perfect plans for anything I start. Camping was no exception. I scoured YouTube and blogs, mentally running dozens of 'tent pitching simulations,' you know. But real life is different! The most embarrassing moment on my first camping trip was tent pitching. 'What on earth is this? Why is the manual so difficult?' I thought, sweating profusely. The plan was perfect, but when I actually tried to set up the tent in a wide-open field, battling the wind, I was drenched in sweat, and the kids kept asking, 'Dad, when will it be ready?' In the end, I had to call for help from a camper at the next site. Looking back now, it just makes me laugh, but at the time, I truly wondered, 'Is camping not for me?' I keenly felt the discrepancy between theory and practice. 🤣
Tent Pitching: It's Easier Than You Think! (Understanding the Core Principles) 💡
But you know, tent pitching is ultimately a 'process' and a 'system'. Just like in IT planning, if you understand the core principles and follow the steps, it's not difficult. Most freestanding tents work by inserting poles to create the frame (skeleton), then covering it with a flysheet (rainfly), and finally securing it firmly to the ground with stakes (pegs). Visualizing this process in your mind makes it much easier. You'll grasp, 'Ah, this is how our tent stands up!'
Beginner Dad's Essential Checklist 📝
Before you start pitching your tent, make sure all these friends are gathered! I've curated only the essentials!
- Tent Body: Obvious, but for beginners, a freestanding dome tent is ideal. (Easy to pitch and good space utilization!)
- Tent Poles: The core component forming the tent's skeleton! Check their connection status and ensure none are bent.
- Stakes & Hammer: The pegs and hammer to secure the tent to the ground. For beginners, I recommend a rubber mallet to avoid hand injuries. It's good to have extra stakes.
- Guy Lines (Strings): Ropes to prevent the tent from flying away in the wind. Prepare enough to connect not only at the corners but also in between, especially for strong winds.
- Groundsheet (Tarp): Protects the tent floor and blocks moisture from the ground. A size slightly smaller than the tent is ideal.
- Gloves: Essential for hand protection! Also protects from twigs and insects. Prevents hands from getting scratched when hammering stakes.
- Manual & Smartphone (YouTube): Your most important hidden cards! Don't lose the manual, and if needed, fire up YouTube immediately!
Tent Pitching: Now You Can Do It Alone! (Step-by-Step Perfect Guide) 🏕️
Alright, here's the actual pitching order. I've put in all the know-how I gained through countless trials and errors, so if you follow this, you'll succeed!
- STEP 1: Choose Your Spot & Clear the Ground 🧹
When choosing a spot to pitch your tent, first look for a flat area with good drainage. Imagine if it rains, will water collect? Will the slope make sleeping uncomfortable at night? Remove any rocks or sharp objects. Even a small stone can cause back pain the next morning! 🤣💡 Good to Know!
Laying a groundsheet under your tent not only protects the tent floor but also greatly helps block moisture from the ground. A size that's just right or slightly smaller than your tent is neat and effective! - STEP 2: Unfold Tent Body & Assemble Poles 🛠️
Unfold the tent body (inner tent) in your chosen spot, and now it's time to assemble the poles, which form the tent's skeleton. Poles are usually connected with elastic cords, so you just need to snap them together. Carefully slide the assembled poles into the sleeves (pole channels) on the tent fabric. If you rush, the poles can bend or break, so 'slowly and carefully' is key. Just like organizing complex cables!⚠️ Beware!
Always ensure the pole joints are fully connected. If not, the tent won't hold its shape properly or will be vulnerable to wind, possibly collapsing easily. - STEP 3: Stand Up the Tent ✨
Once all the poles are threaded through the tent fabric, insert the pole ends into the eyelets (metal rings) at the tent's corners, or secure them into clip-like fixtures. Then the tent will gradually reveal its shape and start to stand on its own. This is the moment when a sense of accomplishment washes over you, 'Ah, I did it! I'm a camping dad now!' 😊 At first, I wrestled with it alone, but now, when my kids shout 'Dad, you're the best!' and run into the tent, that's when I'm happiest. - STEP 4: Stake Down & Secure Guy Lines 💨
Now you need to firmly secure the tent to the ground by hammering in the stakes. When doing this, you should strike the top of the stake at an angle (about 45 degrees) for better penetration and holding power. Consider the wind direction when staking, and pull the guy lines (strings) taut to balance the tent. Our family once had a thrilling experience where our tent almost blew away! (We nearly ended up sleeping in the distant field instead of the campsite.😂) That's when I, as an IT planning team leader, keenly realized the importance of 'worst-case scenario planning and risk management.' If strong winds are forecast, it's even more crucial to stake down meticulously! - STEP 5: Attach the Flysheet & Finish Up ✨
Finally, drape the flysheet (rainfly) over the tent and secure it with strings – done! The flysheet plays a crucial role in protecting the tent from rain, wind, and sun. It's as simple as putting on a roof, but be sure to check the front and back directions, as it can be confusing. Usually, the side with the entrance is the front, right? Once the flysheet is on, your cozy little hideaway is complete. All that's left is delicious camping food and stargazing!
IT Dad's Top Camping Tips! ✨ (Beyond Pitching)
- Tip 1: For Beginners, Always a 'Freestanding Dome Tent'!
For novice campers, a freestanding dome tent is the easiest. Just by inserting the poles, you can get the tent's shape by yourself, reducing trial and error. This aligns perfectly with my IT project management principle: 'Start with the simplest first!' - Tip 2: YouTube is the Best Manual!
No matter how detailed a manual is, it's hard to follow actual movements. Search for your tent model name on YouTube. Following along with real pitching videos makes it much easier. I benefited a lot from it! 'Seeing is believing' is true for camping too! - Tip 3: 'Rehearsal' at Home is a Must!
Instead of sweating and panicking at the campsite, I recommend pitching it once beforehand in your living room or backyard. It reduces fumbling on-site and builds confidence, making you think, 'Ah, this is how it's done!' It's like rehearsing before an important presentation! - Tip 4: Don't Buy All the Gear at Once!
Don't try to get all the perfect gear right from the start. There's real joy in acquiring things one by one as needed. It's like building an MVP (Minimum Viable Product) for a project and gradually developing it! Try borrowing or starting with affordable items. - Tip 5: Failure is the Mother of Success – Laugh It Off!
Everyone is clumsy at first. It's okay if your tent is crooked or you forget a pole. Such minor mistakes become camping memories. If you laugh them off, they become 'our unique camping story.' My kids still tell stories about how I hammered stakes in the wrong place and our tent danced. 🤣
Key Takeaways 📝 (Final Advice from an IT Dad)
- Don't Fear Tent Pitching!
It's challenging at first, but if you understand the core principles (poles + fabric + flysheet + stakes) and follow the steps carefully, anyone can do it. - Preparation and Practice are Key!
Gather the necessary supplies and practice at home before going to the campsite. YouTube is your best helper! - Failures are Memories!
It's okay not to be perfect. Unexpected situations and trial-and-error experiences will make your camping trip richer and create precious memories with your family. In IT planning, 'learning from failure' is crucial too!
Frequently Asked Questions ❓
How was my trial-and-error tent pitching guide today? Does pitching a tent seem a bit less intimidating now? 😊 Camping doesn't require fancy gear or perfect skills. The moments spent with loved ones in nature are precious memories in themselves. If you have any questions about tent pitching or other camping topics, feel free to leave a comment! I hope my experience can be a small help on your first camping journey, and I'll see you in the next camping note! 🏕️🔥
댓글
댓글 쓰기